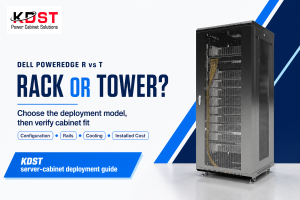
How to Choose a 19 Inch Rack Enclosure: Sizes, Types, and Mounting Standards Explained
Quick Specs
| Standard Width | 19 inches (482.6 mm) total front panel |
| Mounting Width | 17.75 inches (450.85 mm) between posts |
| Rack Unit (1U) | 1.75 inches (44.45 mm) height |
| Governing Standard | EIA-310-D / CEA-310-E |
| Common Heights | 6U – 48U (10.5 in – 84 in) |
| Depth Range | 600 mm – 1,200 mm (24 in – 48 in) |
| Typical Load Capacity | 150 – 1,200+ lbs depending on type and material |
A 19 inch rack enclosure is a rack enclosure that covers servers, switches, patch panels and electronics gear housed in a standard frame. From a small network closet to an entire datacenter, choosing a rack enclosure has impact on airflow, cable routing, physical security and future expansion. Here is a brief guide to size specifications of EIA-310 standard, types of enclosures, material compromises and a practical method to select a rack enclosure from actual specifications.
What Is a 19 Inch Rack Enclosure?

A 19 inch rack enclosure, is a standardized cabinet or frame for mounting rack-mountable electronic equipment. The “19 inch” specification refers to the width of the equipment’s front panels including the frames, which is not the width of the equipment’s mounting panels in the rack. The mounting width between the two vertical posts of the enclosure is 17.75 inches (45.085cm) and allows 0.625 in (1.5884cm) on each side of the post flanges.
This arrangement emerges from the AT&T telephone relay gear of about 1922, when telecommunications engineers wanted something repeatable to stack and swap telephone repeaters. The concept was taken up by military, broadcasters, telecom, and information technology firms over the next few decades. The Electronic Industries Alliance published the dimensions in EIA-310-D in September 1992, later revising it as CEA-310-E in December 2005.
Virtually all servers, network switches, Uninterruptible Power Supplies (UPS), and patch panels sold worldwide adhere to this 19 inch rack standard today.
The 19inch is the outer panel width. When selecting equipment you need to make sure the piece of equipment will fit into the 17.75″ mounting rail spacing not the 19″ width.
Standard 19 Inch Rack Sizes and Dimensions

Installation height is specified in rack units (U or RU). In this case one rack unit is defined as 1.75 inches (44.45 mm). The actual panel height in millimeters for a particular U was defined by EIA-310 to be: height in mm is 44.45n 0.794, where n equal the number of rack units. 0.794 mm is the gap between adjacent panels that prevents them from actually touching physically.
| Rack Size | Height (inches) | Height (mm) | Common Application |
|---|---|---|---|
| 1U | 1.75 | 44.45 | Single switch, patch panel, brush panel |
| 2U | 3.50 | 88.90 | Rackmount server, firewall, amplifier |
| 4U | 7.00 | 177.80 | Storage array, rackmount chassis, UPS |
| 6U | 10.50 | 266.70 | Small wall-mount enclosure, desktop rack |
| 12U | 21.00 | 533.40 | Wall-mount cabinet for branch office |
| 22U | 38.50 | 977.90 | Half-height floor-standing rack |
| 42U | 73.50 | 1,866.90 | Standard data center server rack cabinet |
| 48U | 84.00 | 2,133.60 | High-density data center, telecom central office |
Height and panel width are determined by the EIA-310 standard, but rack depth is less constrained. 600 mm (24 in) is used for shallow network rack cabinets, and 1,200mm (48 in) for deep server racks containing deep blade servers. The vast majority of 19 in rack enclosures sold today are between 800 mm and 1,070 mm deep. In telecom installations, the 600 mm deep case is most common since switches and patch panels are rarely more than 400 mm deep.
📐 Engineering Note
Repeats at ½ inch–¼ inch–¼ inch vertical for the entire rack unit. Horizontally, the hole spacing from the centerline of one side rail to another is 18.312 635 (465.1 390). Most rails are 0.625 111 (15.88 799) wide, with square punched holes (for cage nuts), or threaded (for 10-32, 12-24, or M6 machine screw) holes.
Types of 19 Inch Rack Enclosures

The 19 inch rack format is not a one size fits all. There are several physical formats. Each type is suited to different environments and burdens.
Selecting the wrong type is one of the most common procurement errors – a wall mount cabinet too weak to support three servers, an open frame rack in a dusty warehouse without side panels.
Open-Frame Racks (Two-Post and Four-Post)
Open-frame racks are found consisting of mounting rails without an enclosure. The two-post rack is the least high density at 2 posts, best suited for electronic components such as network switches, patch panels, etc, or lighter weights below 200 lbs.4 post open racks have the addition of rear mounting rails, supporting heavier loads such as servers, UPSs, etc, side by side. Open frame racks provide the greatest airflow, as well as the quickest appliance access, but no safeguard from dust or physical access.
Wall-Mount Rack Cabinets
Wall-mount enclosures built from 6U up to 18U high connect directly to a wall or other structural surface. They can help conserve valuable floor space for branch offices, retail sites, and AV control rooms. The majority of wall-mount 19 inch rack cabinets also have a swing-out or hinged back for rear cable entry.
Load limits are also less than floor-standing enclosures – typically 60 to 150 lbs maximum – because mounting hardware has to transfer all weight to the wall studs or masonry anchors.
Floor-Standing Server Rack Cabinets
Floor-standing rack cabinets – Enclosed, lockable doors on all four sides, with removable side panels and integrated cable management features capable of supporting heavy loads. 22U to 48U, with 42U being the data center standard. These NEMA 1/IP40 rated indoor server rack cabinets support the most weight – 1,200 lbs + on steel frames – and provide highest level of dust and tamper protection, Adjustable depth rails for different sized servers and perforated front door for increased airflow.
Rackmount Chassis and Desktop Enclosures
Rackmount chassis enclosures are small housing units (1U to 6U) intended for mounting in a bigger rack, preserving the safety of one piece of equipment test instruments, amplifiers, industrial controllers, etc. with an individual aluminum or steel shell. Desktop models can be placed directly on a shelf or bench, and do not have to be mounted in a frame. This is useful for small-size IT networks and containing a number of equipment pieces in a lab room.
Pre purchase calculate the total weight of the equipment you may intend to install (with 20% over capacity growth). Wall mounted enclosures should be no more than 60% of the anticipated load to ensure safe wall anchoring as they “grow” over time.
Materials and Construction: Steel vs. Aluminum
The material of the frame of a 19 inch rack enclosure will affect how much it can support, its weight, rate of corrosion, and its cost. Commercial enclosures are predominantly made of either cold-rolled steel or extruded aluminum.
| Property | Cold-Rolled Steel | Extruded Aluminum |
|---|---|---|
| Typical Gauge / Thickness | 14–16 gauge (1.2–1.9 mm) | 2.0–2.8 mm walls |
| Static Load Capacity (42U) | 1,200–2,500 lbs | 500–750 lbs |
| Frame Weight (42U) | 150–250 lbs | 60–100 lbs |
| Corrosion Resistance | Requires powder coating or zinc plating | Naturally oxidizes to protective layer |
| Thermal Conductivity | 50 W/m·K | 205 W/m·K (4× higher) |
| Thread Durability | High — resists stripping | Moderate — threads can strip if over-torqued |
| Price (42U cabinet) | $500–$2,000 | $800–$3,000 |
As per EIA-310, 1.9 mm (16 gage) minimum post thickness is specified for steel mounting rails. Deep server installation high capacity ( Floor standing racks with floor depth > 1,000 mm. Generally use 14 gage (1.9 mm thick) steel panels to resist bending when loaded.
Aluminum racks tend to lose 40-60% frame weight over steel racks and hence are advantageous for portable broadcast racks, short term setup and facilities with low floor load capacity.
✔ Steel Advantages
- Higher load capacity per unit thickness
- Threaded holes resist repeated screw insertion
- Lower raw material cost at scale
- Better EMI shielding for sensitive equipment
✔ Aluminum Advantages
- 40–60% lighter than steel at equivalent height
- Corrosion resistant without coatings
- 4× higher thermal conductivity aids passive cooling
- Easier to cut, drill, and customize on-site
Cooling, Cable Management, and Accessories

Airflow management is the one factor that makes or breaks a new rack installation. A good installation keeps cooling focused on the servers where it is needed and confines it within the enclosure. Most servers push air from front-to-back, so the rack must be designed to accommodate this airflow. The U.S. Department of Energy ENERGY STAR program identified airflow management in server racks as one of the most effective ways to eliminate unnecessary energy waste in data centers.
Cooling Strategies by Enclosure Type
Enclosed cabinets depend on perforated doors and roof-mounted exhaust fans. Front doors and panels can be perforated, 63% as a general minimum (static pressure at the fan intake of 0.67). Fill empty 1U rack spaces with blanking panels to prevent easy hot-air recirculation, cooling the internal rack up to 20F. Open-frame racks have open architecture, but lack airflow containment and control, making them unsuitable for high-density deployments of 5K 0 per rack and above.
📐 Engineering Note
Estimate cooling requirements of enclosed rack cabinets based on an average of 3,412 BTU/hr per 1 kW of equipment power draw. Fully loaded 42U rack drawing 5 KW would be approximately 17,060 BTU/hr. If sufficient passive airflow in the rack is not provided by a perforated door then mount roof fans rated 200-400 CFM directly over the exhaust opening, or install an enclosed rack-mounted air conditioning unit rated to the calculated BTU load.
Cable Management
Passenger cable management is a common obstructor of venting and airflow inside a rack enclosure. Vertical cable managers unobtrusively organize patch cables and electrical cords exiting the rack, improving internal ventilation efficiency by 15-20%. Horizontal managers installed between every 1U or 2U of cabinet space organize patch cord routing without encroaching upon airflow zones. Brushed cable entrance panels at the top and bottom allow cables to penetrate through the enclosure without creating a vent gap that disrupts airflow.
Essential Accessories
- ✔
Blanking panels (1U and 2U) for every unused slot - ✔
PDU (Power Distribution Unit) — the most important single accessory – use a vertically mounted PDU for dense racks. - ✔
Cage nuts, screws, and washers (10-32 or M6 standard) - ✔
Adjustable mounting rails for variable-depth equipment - ✔
Locking shoes on casters for free-standing units that can withstand 20-250 lb of floor weight installation. - ✔
Bonding wire with electrical lug for ESD protection per NFPA 70 National Electrical Code.
Keep 4-6 inches of clearance from the front of the rack to the cold aisle wall. Rear clearance is also critical. Enclosed cabinets should not touch or be pushed flush with the wall. Exhaust breath on those that are flush, raising internal temperatures by up to 25 F at full load.
How to Choose the Right 19 Inch Rack Enclosure

Because the choice of the perfect enclosure depends on five objective factors, one cannot rely on guesswork to select equipment that is Just Right. This can either strain facilities by forcing the purchase of a too-big unit, or send them rushing to find a solution within a year. Follow these installation guidelines for an appropriately sized enclosure.
5-Step Selection Framework
- -0007.Determine the U capacity of the planned equipment installation. Sum together each device’s height in U, then add an additional 25-30% for future growth and cable management hardware. For instance, 24U of equipment installation will require a 32U-34U enclosure at a minimum.
- Identify the deepest piece of equipment in the planned installation. Then add 150 200 mm of space for rear cable room. For example, an 700 mm deep server will require a rack with no less than 850-900 mm of room.
- This is where you decide on the type of enclosure. In branch offices, the typical rack occupation will be 6 12U of network gear hung on a wall-mounted rack. Server room installations tend to house 20U or more of gear on a free-standing rack. Labs and ad hoc offices can use open frame racks.
- Choose materials according to the load and mobility. Permanents host datacenter, constructed with steel (1,200+ lb full). Mobility supports broadcast or field deployment, lightweight aluminum (40-60% lighter).
- Design cooling early. For racks pulling less than 3 kW, passive cooling with perforated doors is enough. For more than 3 kW, supplemental cooling elements are preferable (fans or rack-mounted AC). Always plan for blanking plates.
Price Benchmarks by Category
| Enclosure Type | Typical U Range | Price Range (USD) |
|---|---|---|
| Open-frame 2-post rack | 12U – 45U | $100 – $400 |
| Wall-mount rack cabinet | 6U – 18U | $150 – $800 |
| Floor-standing steel cabinet | 22U – 48U | $500 – $2,000 |
| Floor-standing aluminum cabinet | 22U – 48U | $800 – $3,000 |
| Weatherproof NEMA-rated enclosure | 4U – 42U | $400 – $2,500+ |
KDST manufactures custom 42U IP40 rack enclosures specifically built to meet customer data center and telecommunications network room environment constraints. Their flexible design combining adjustable depth rails, glass doors and integral cabling provision calls for a high degree of factory assembly, ultimate to preassemble the equipment in the factory as a single assembly rather than individual components on site.
Installation Tips and Rack Mounting Best Practices

Incorrect mounting can cause equipment damage, misalignment and safety issues. Performing proven procedures in mounting equipment will prevent most errors encountered in the field.
Cage Nut Installation
The most widely used fastening system on 19 inch racks with square punched mounting holes is the cage nut. It is made of a square nut with a spring steel cage retained in the nut washer. Typical sizes are 10-32, 12-24, and M6. When installing cage nut, always fasten it at the back of the rack rail, distributing the load on the nut body rather than spring clip tabs. Insert them from the front produces great pressure on the clips that can disengage under heavy loads.
The single greatest installation error is installing cage nuts on the front side of a rail. When the equipment is loaded, the nuts are pushed backwards and the equipment is driven forward. Vibrations or more weight retightens the tabs and releases the hook that can drop the rack equipment on the floor. Always insert cage nuts by the back side.
Alignment and Leveling
Start from the bottom and work toward the top. This might reduce the risk of tipping over. Use a spirit level in the front and lateral sides of the equipment while tightening the bolts. A lean of 2-3 degree may growth over a 42U high rack, resulting in uneven distribution of equipment even to top of the rack. Always adjust the levelers of the free-standing console on uneven floors prior to rack assembly, then lock the free-standing casters.
Screw Torque and Thread Care
Rigidly hand tighten all the screws and fastenings – 15-20-in-lb is enough. We tend to achieve this value on 10-32 and M6 fastenings. That’s enough to break the threads in aluminum and steel frames. For aluminum racks use a torque screwdriver set up at 15 in-lb maximum – excessive torque can damage the threads in the aluminum. Check damaged threads by removing the nuts and testing the strength. Discard threads that can be dislodged. Only mount on these magnetic nuts.
- ✔
Ensure proper cage nut retainer seating - ✔
Install the entire cage nut for a total device before sliding the device into the rack - ✔
Use cage nut installation device – fingers installation causes holes on their bodies. - ✔
Number each U door with a number-list for field identification. - ✔
Separate the poweh and data wiring in two different sides of the rack, to minimize close coupling
Frequently Asked Questions

Q: How wide is a 19 inch rack enclosure?
View Answer
Q: What is the difference between a rack cabinet and a rack enclosure?
View Answer
Q: What U size do I need for my server equipment?
View Answer
Q: Can I wall-mount a 19 inch rack enclosure?
View Answer
Q: How do I calculate cooling requirements for a rack enclosure?
View Answer
Q: What is the standard depth of a 19 inch rack?
View Answer
Are you in search of a custom 19 inch rack enclosure for your data center or telecommunications rack mount project?
About This Analysis
KDST is a manufacturer of custom protective enclosures for telecomm, data center, and industrial uses. The dimensional specifications and the enclosure installation recommendations in this guide is derived from the EIA-310-D/CEA-310-E standards, the ENERGY STAR data center efficiencies guideline, and field installations practices documented in over hundreds of rack deployments. We produce rack enclosures to this specifi ion–the same specifi ion where we cite it below as the engineering reference point.
References & Sources
- EIA-310: What Does It Mean? — RackSolutions
- 19-inch rack — Wikipedia
- What is EIA-310-D? — NavePoint
- Manage Airflow for Cooling Efficiency — U.S. Department of Energy ENERGY STAR
- NFPA 70: National Electrical Code — National Fire Protection Association
- Cage Nuts: The Ultimate Guide — Network Computing